How to Configure Gmail SMTP on Your WordPress Website
This article walks you through setting up Gmail SMTP for your WordPress website using the WP Mail SMTP plugin and Google Cloud Console. This configuration allows you to send emails securely via Gmail instead of relying on your hosting server.
Prerequisites
- A Gmail or Google Workspace account
- Admin access to your WordPress site
- Access to Google Cloud Console
Step 1: Create a project in Google Cloud
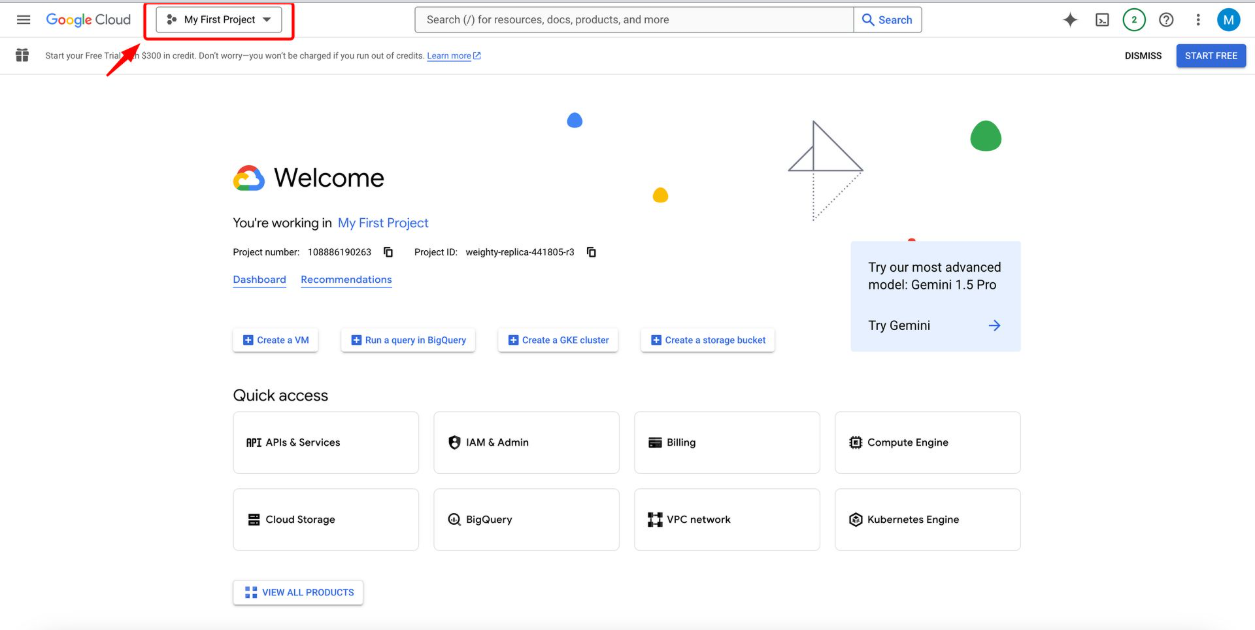
- Go to Google Cloud Console.
- Log in with your Google account.
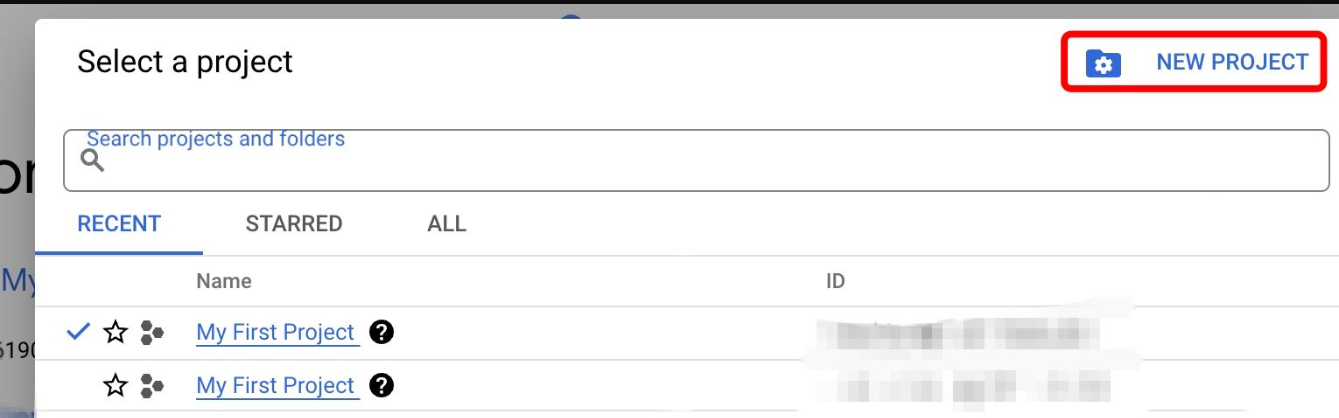
- Click
Create Project, name it (e.g., "Gmail SMTP"), and clickCreate.
Step 2: Enable the Gmail API
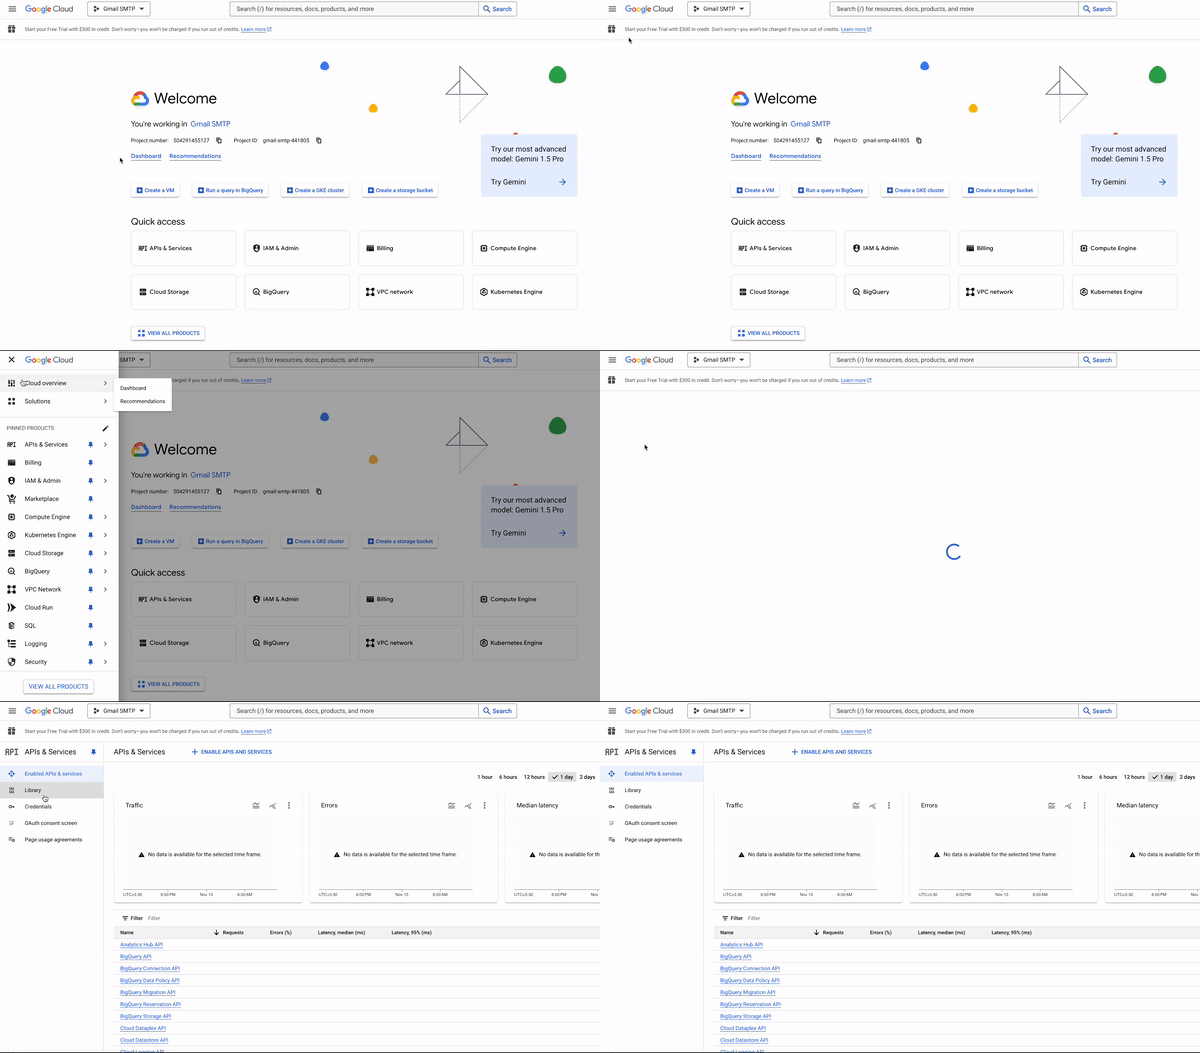
- In the Google Cloud Console, navigate to
APIs & Services→Library. - Search for
Gmail API, click it, and then clickEnable. - Click
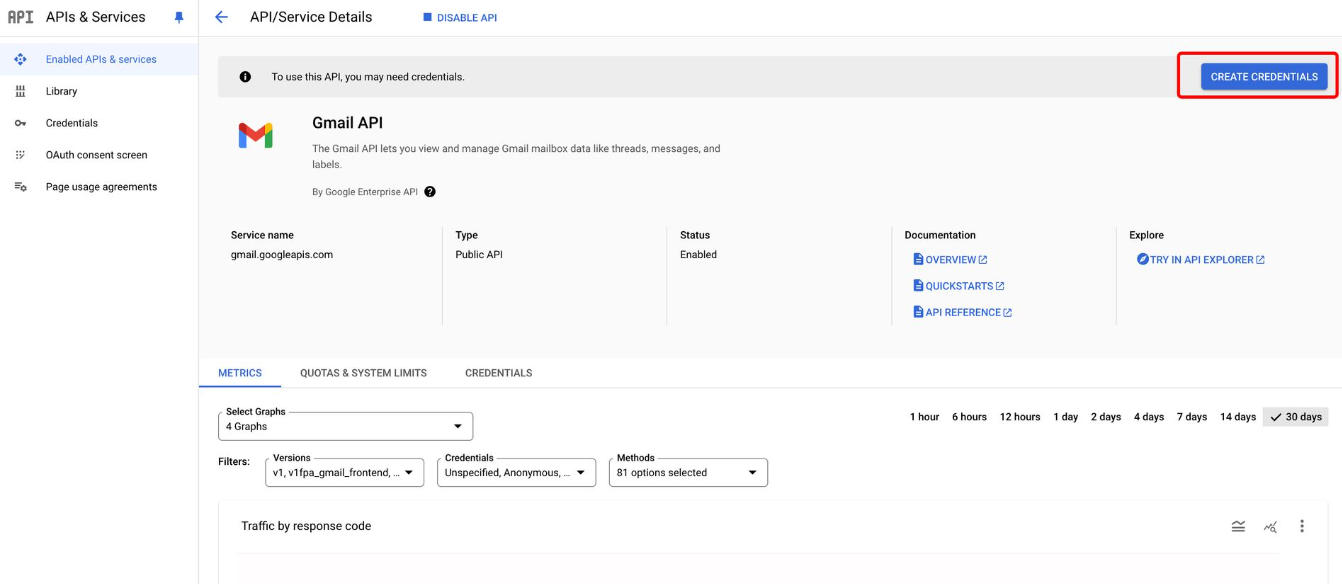
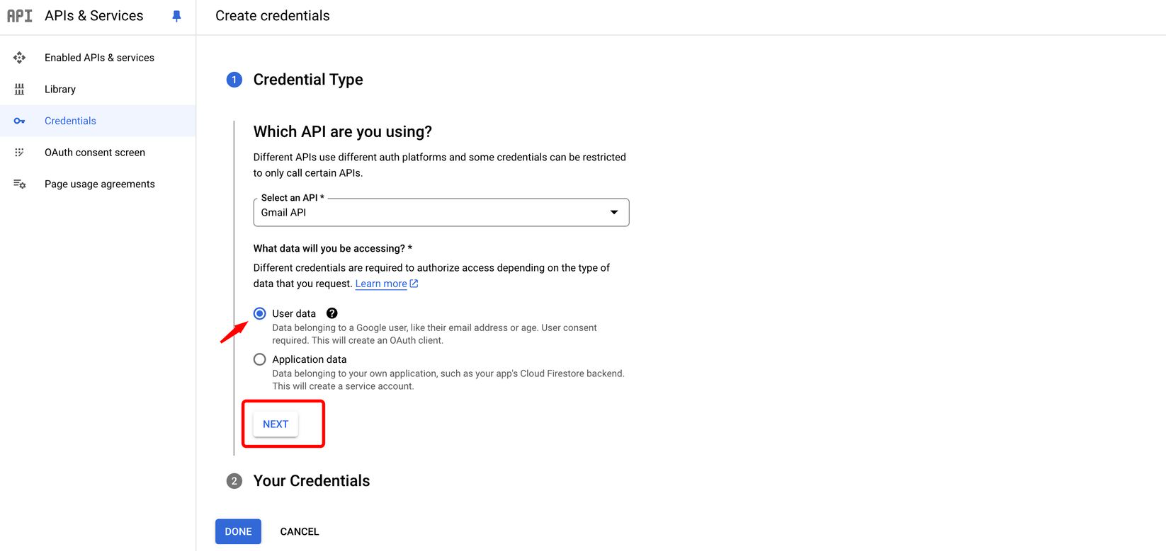
Create Credentialsto begin setting up your OAuth access.
- Click
Create Credentialsto generate a client ID.
Step 3: Set up OAuth consent screen & credentials
- Go to
Credentials→OAuth consent screen. - Choose
User TypeasExternal, then clickCreate.
-
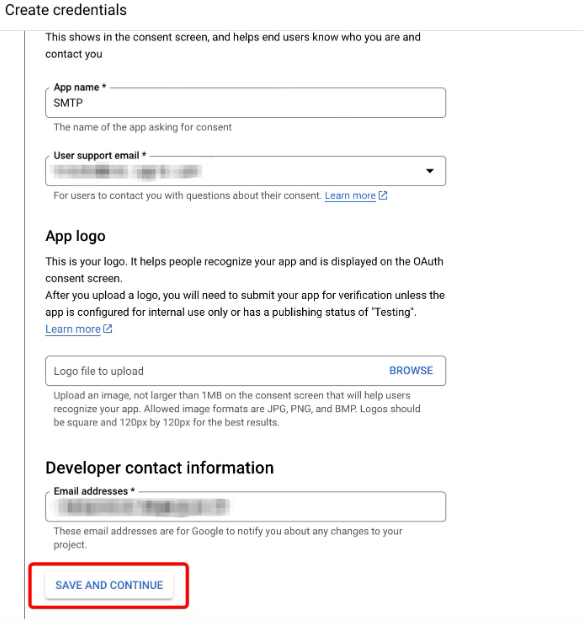
Fill in:
App name: SMTPUser support email: Your Gmail addressDeveloper contact email: Your Gmail address
-
Skip scopes and click
Save and Continue. -
Under
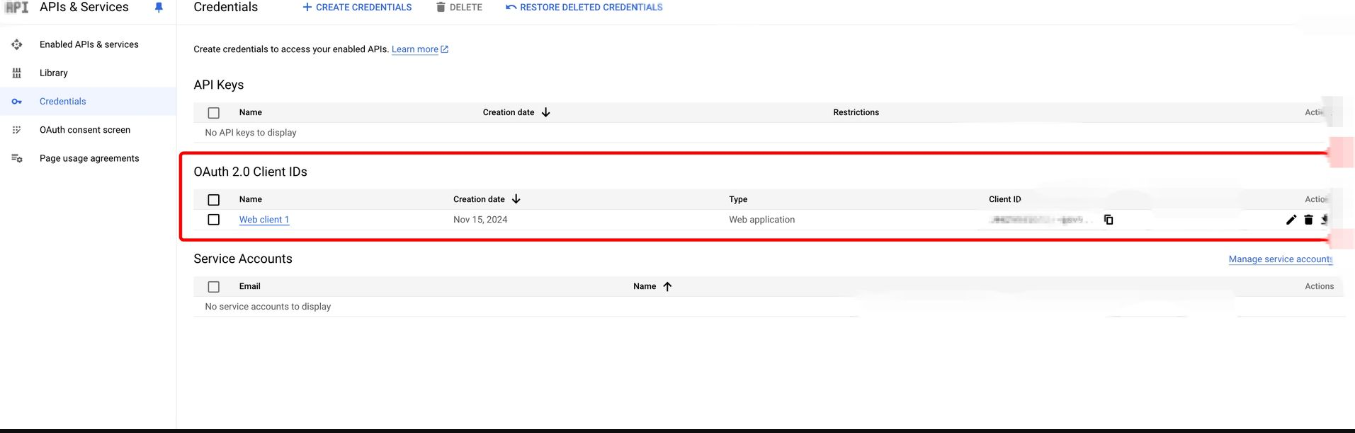
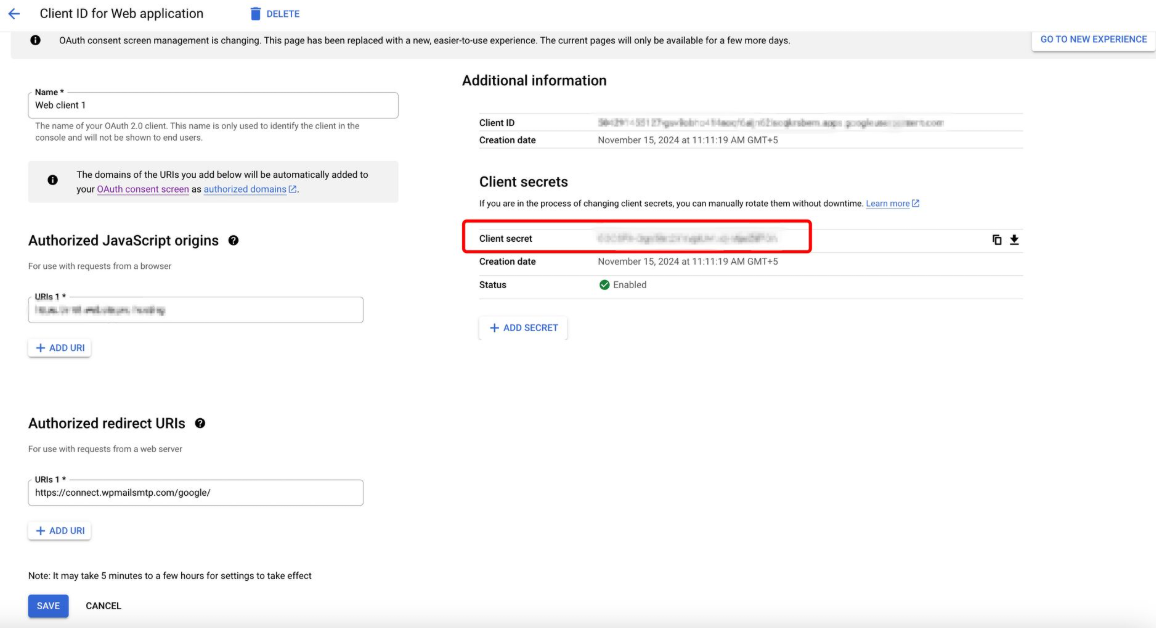
Credentials, clickCreate Credentials→OAuth Client ID.Application type: Web applicationName: Web Client 1 (or your choice)Authorized redirect URI:https://connect.wpmailsmtp.com/google/
- Click
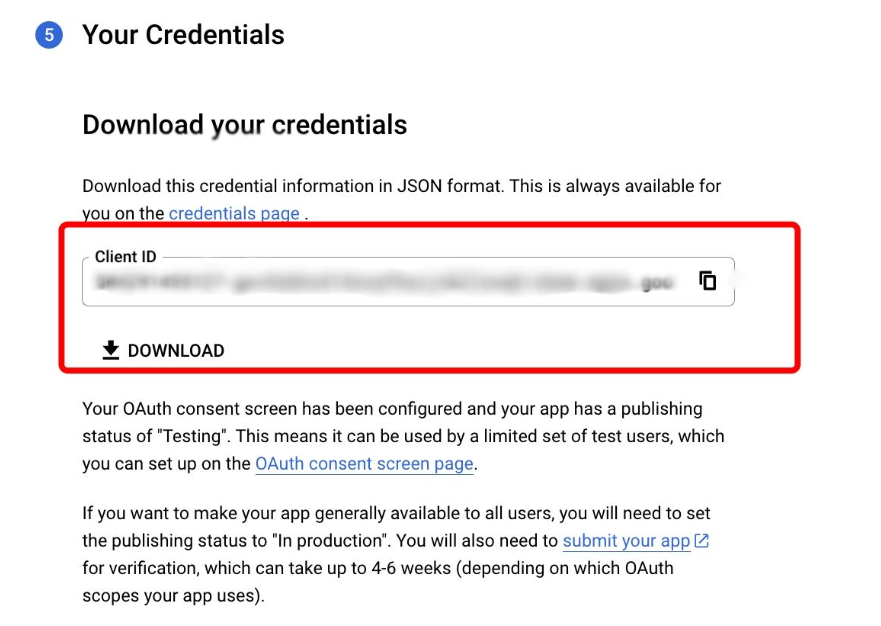
Createand copy both theClient IDandClient Secret. You'll need these in Step 5.
Step 4: Publish the app
- Go back to
OAuth Consent Screen. - Click
Publish Appto switch from testing to production mode.
info
Testing mode limits usage to 100 users. Publishing removes this limit.
Step 5: Configure WP Mail SMTP plugin
Install the plugin
- Go to your WordPress dashboard.
- Navigate to
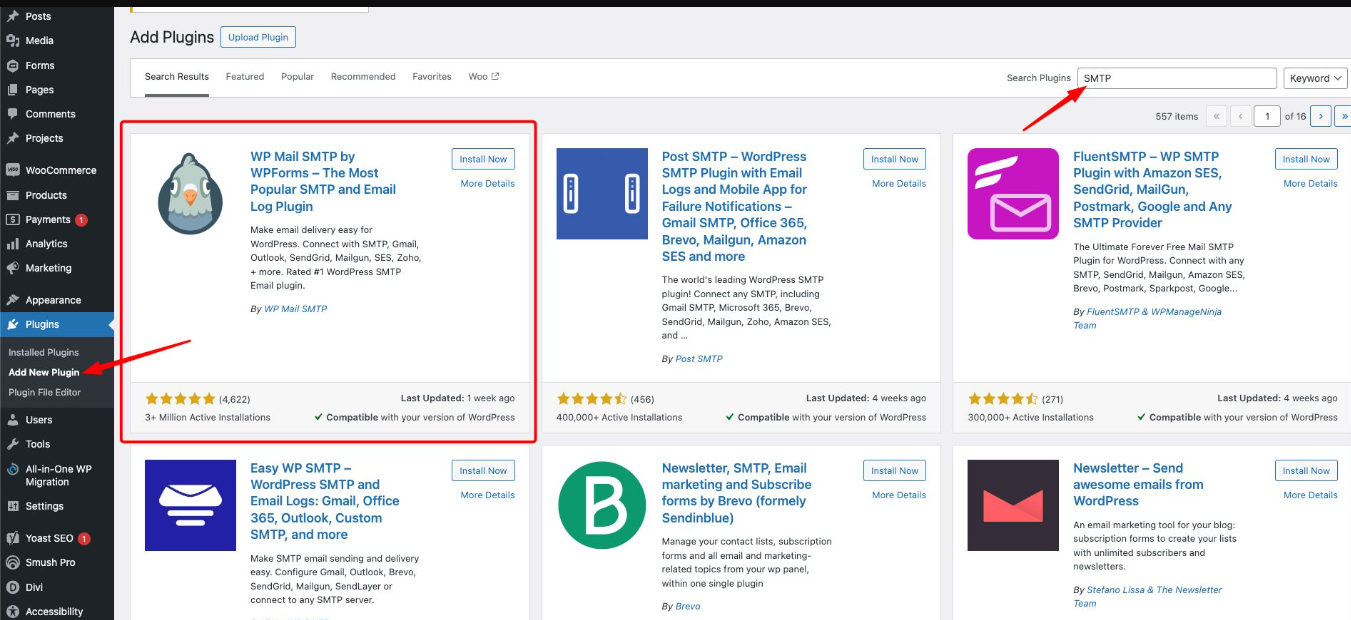
Plugins→Add New. - Search for
WP Mail SMTP, install, and activate it.
Configure the plugin
-
Go to
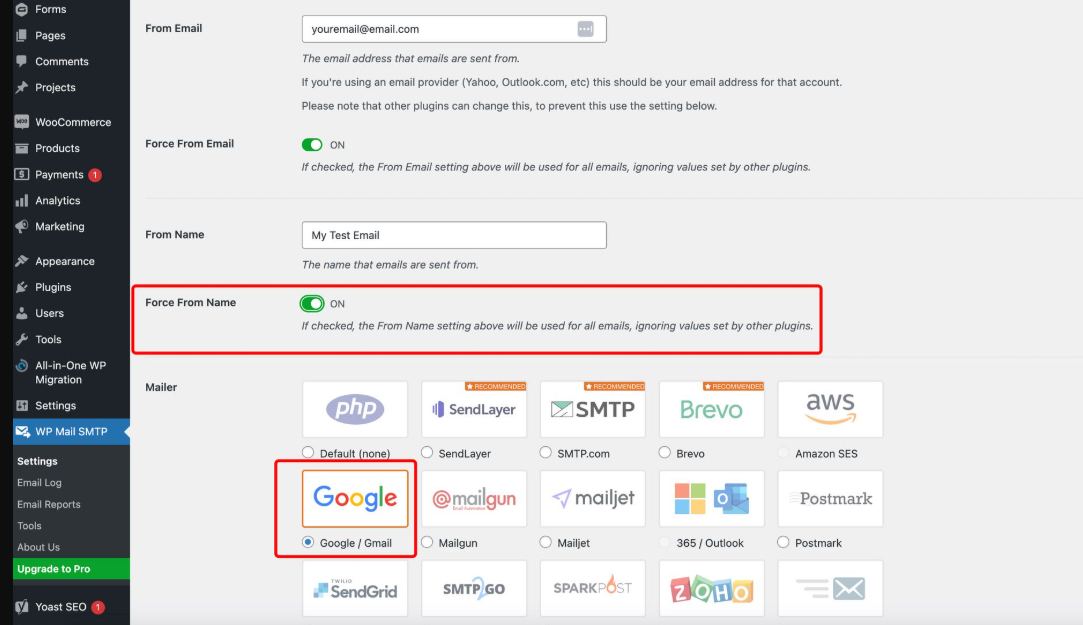
WP Mail SMTP→Settings. -
Fill in:
From Email: Your Gmail addressForce From Email: EnabledFrom Name: e.g., "Test Email"Mailer: Google
-
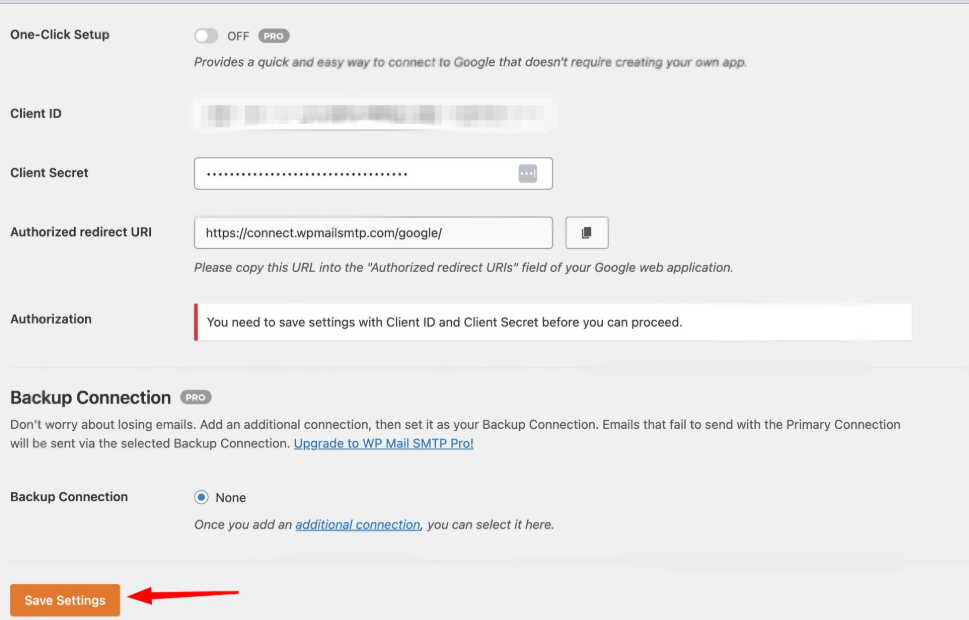
Paste your
Client IDandClient Secretfrom Google Cloud. -
Save the settings.
Authorize Gmail
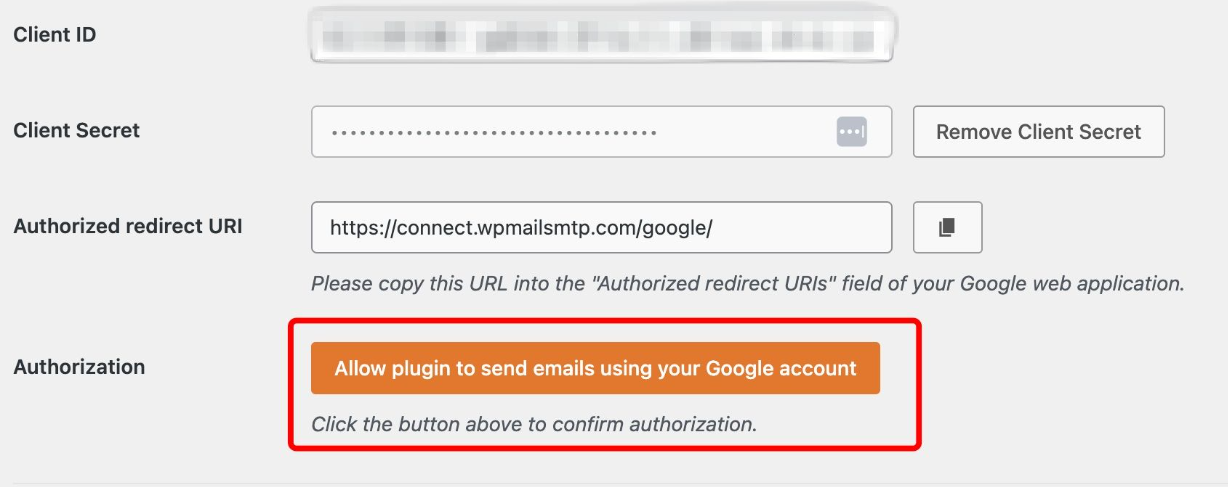
- Click
Allow plugin to send emails using Google. - Log in to your Google account and grant permissions.
- If prompted with a warning, click
Advanced→Go to WP Mail SMTPand continue. - You'll be redirected back to your site once authorization is complete.
Step 6: Disable Website Pro Mail System
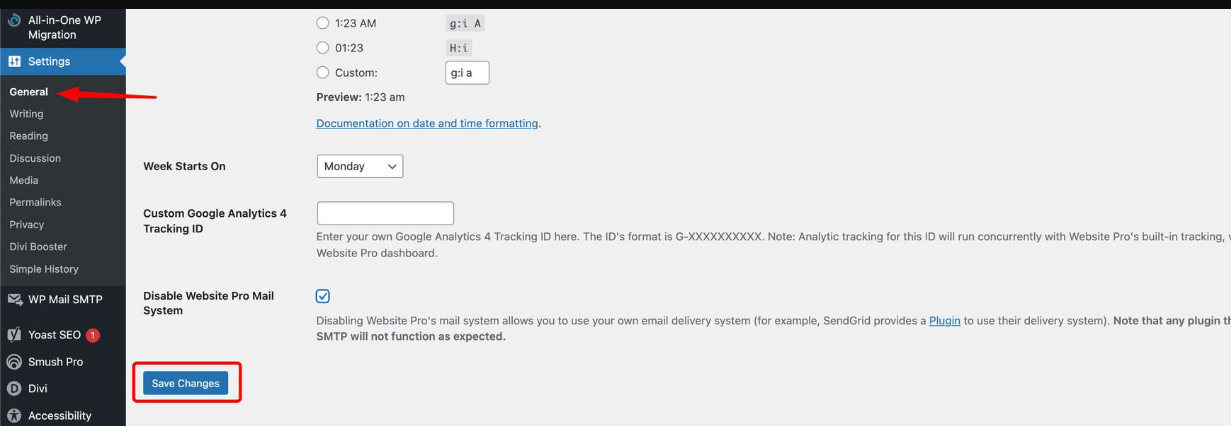
- In your WordPress dashboard, go to
Settings→General. - Disable the
Website Pro Mail Systemto allow WP Mail SMTP to take over.
Step 7: Test the configuration
- Install the
WP Mail SMTP Email Testplugin (if not included). - Go to
WP Mail SMTP→Tools→Email Test. - Send a test email.
- Look for the message: "Email has been sent!"
- Check your inbox to confirm delivery.
You've now configured Gmail SMTP on your WordPress website. This setup improves deliverability and ensures your site uses Gmail's secure and reliable email service.