Zapier → Business App
When an event happens in another app, like a new payment in QuickBooks or a new customer in your booking system, Zapier can fire one of your Business App automations automatically. This page walks you through setting that up.
Prerequisites
- An active Zapier account
- An account with the external app you want to use as your trigger (for example, QuickBooks Online, Google Forms, or any other Zapier-supported app)
- A Business App automation using the Triggered via Zapier trigger
- The automation must be turned on
Example
Google Form event registration → send a confirmation email
When someone fills out your event registration form in Google Forms and provides their company name, Zapier passes that data to a Business App automation. The automation looks up a contact at that company and sends them a confirmation email letting them know their company is registered for the event.
How to set up
There are three parts: setting up the automation in Business App first, then configuring the Zap in Zapier, then testing and publishing.
The steps below use Google Forms as the example trigger app. Your external app (Google Form, QuickBooks, etc.) should already be set up and collecting data before you begin.
Part 1: Set up the automation in Business App
Your automation must use the Triggered via Zapier trigger so Zapier knows which automation to fire.
Step 1: Go to Business App > Automations and create a new automation or open an existing one.
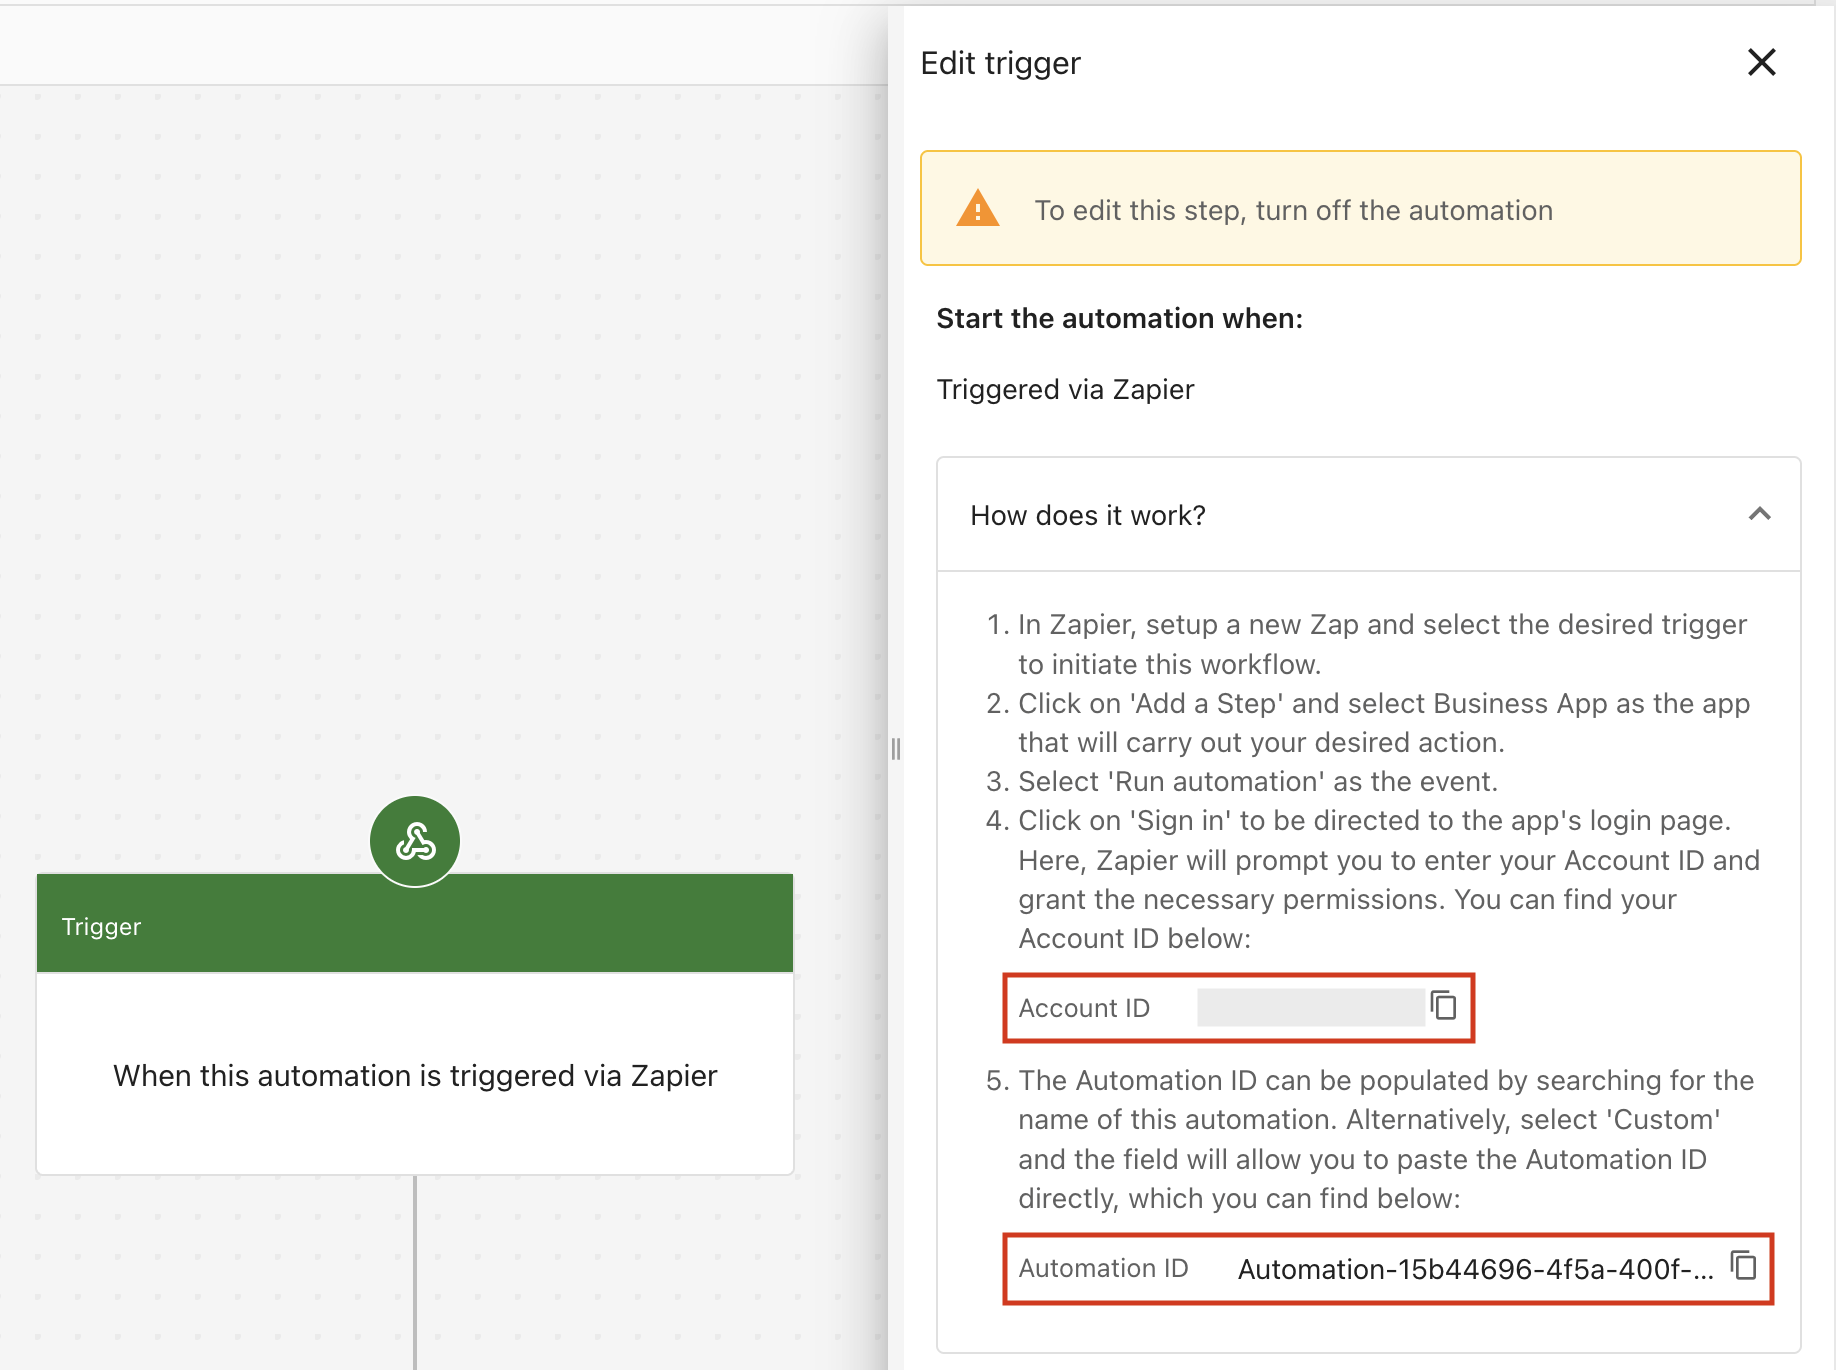
Step 2: Set the trigger to Triggered via Zapier, found under Advanced in the trigger picker.

Step 3: In the trigger's side panel, note your Account ID and Automation ID. You'll need both when setting up the Zap in Zapier.
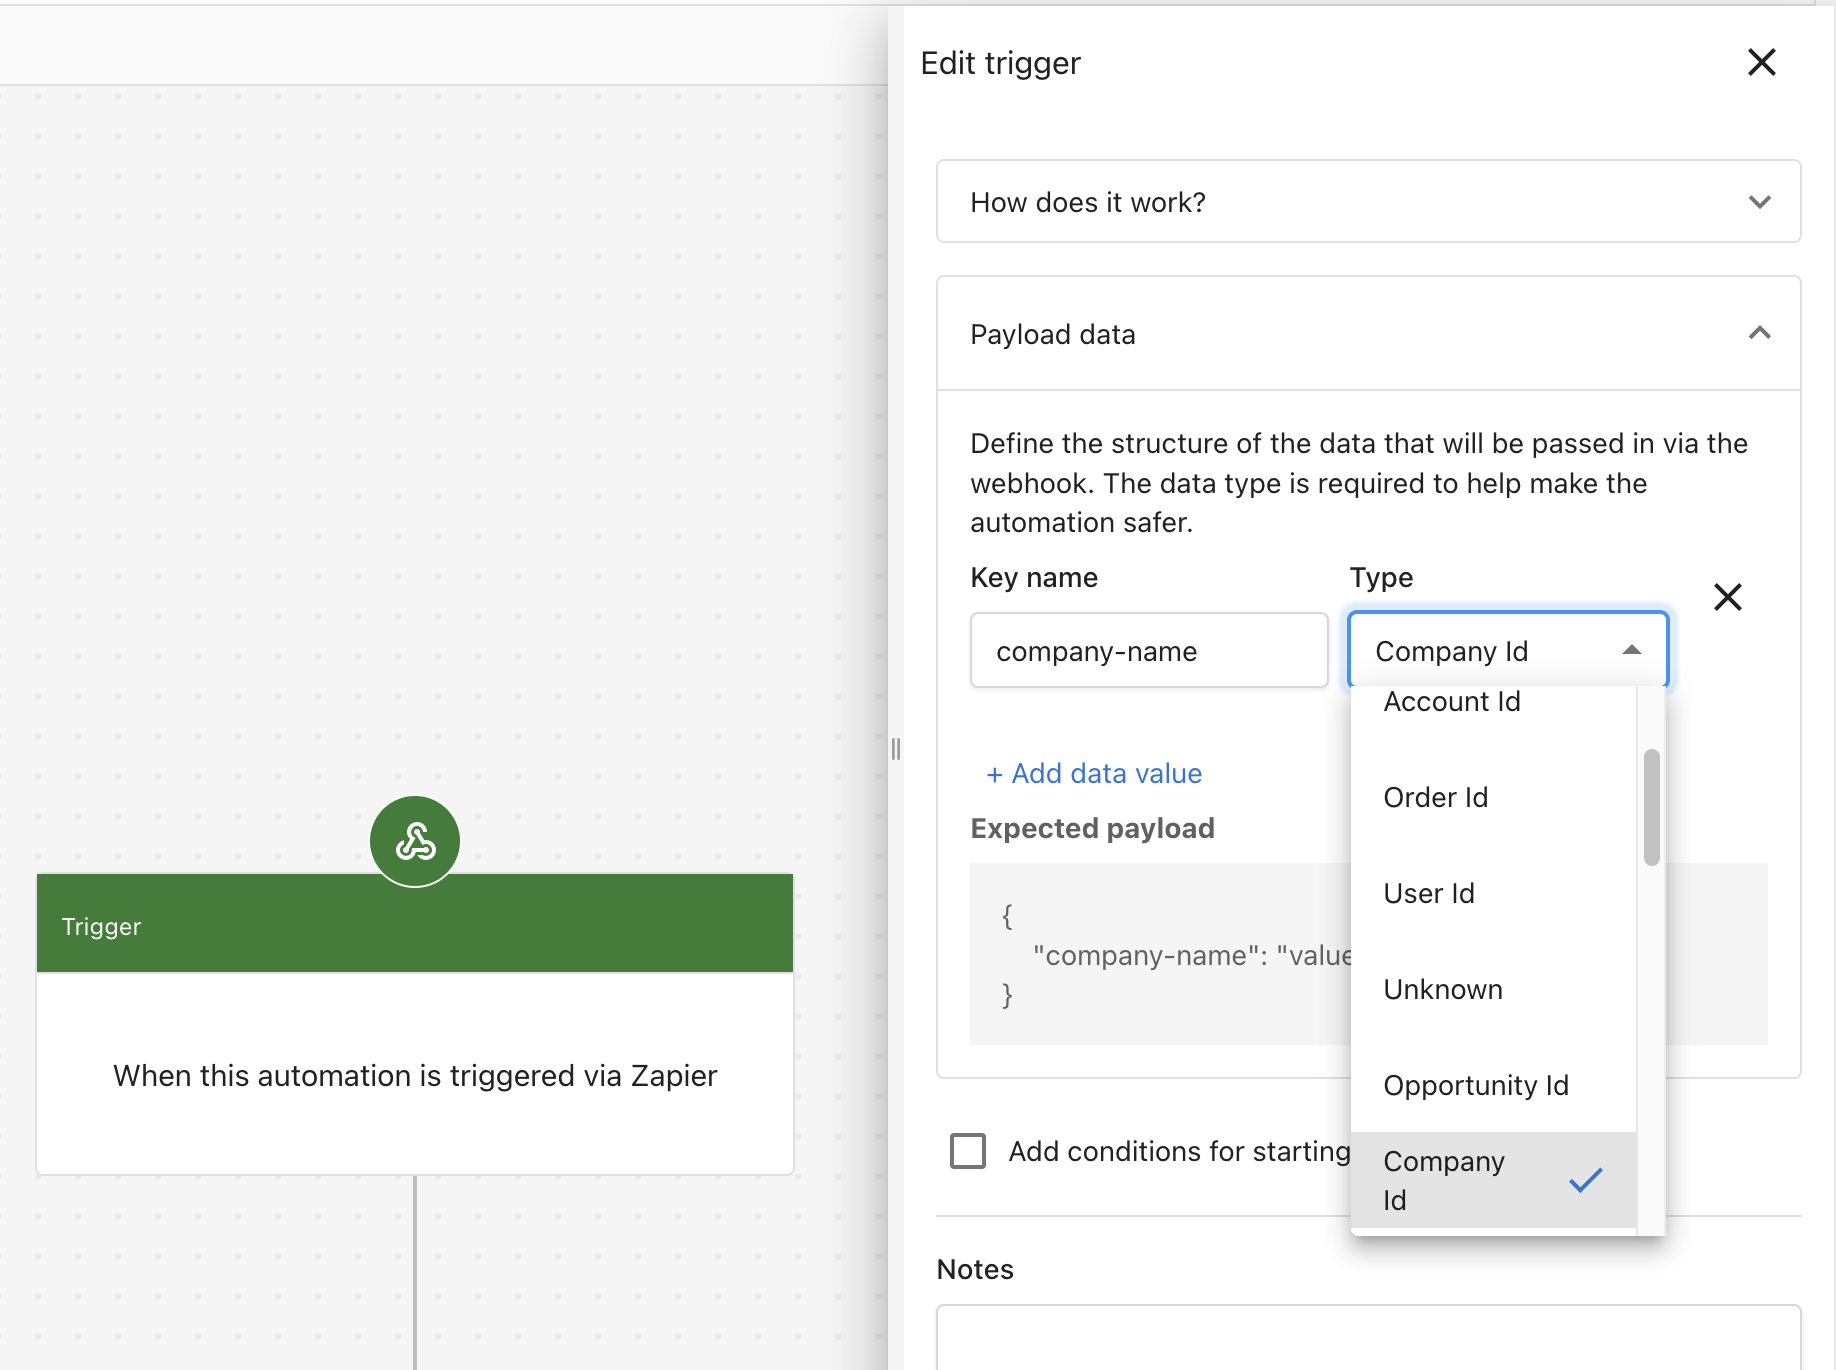
Step 4: Define your Payload data. This is the data your external app will send to Business App when the automation runs. For each piece of data, enter a Key name (make it descriptive, like company-name) and select its Type.
The Type should reflect how that data is used in Business App. In this example, the Google Form collects a company name, and in Business App a company is identified by its Company Id, so set the Type to Company Id.
If your automation needs more than one piece of data from the external app, click  to add additional fields.
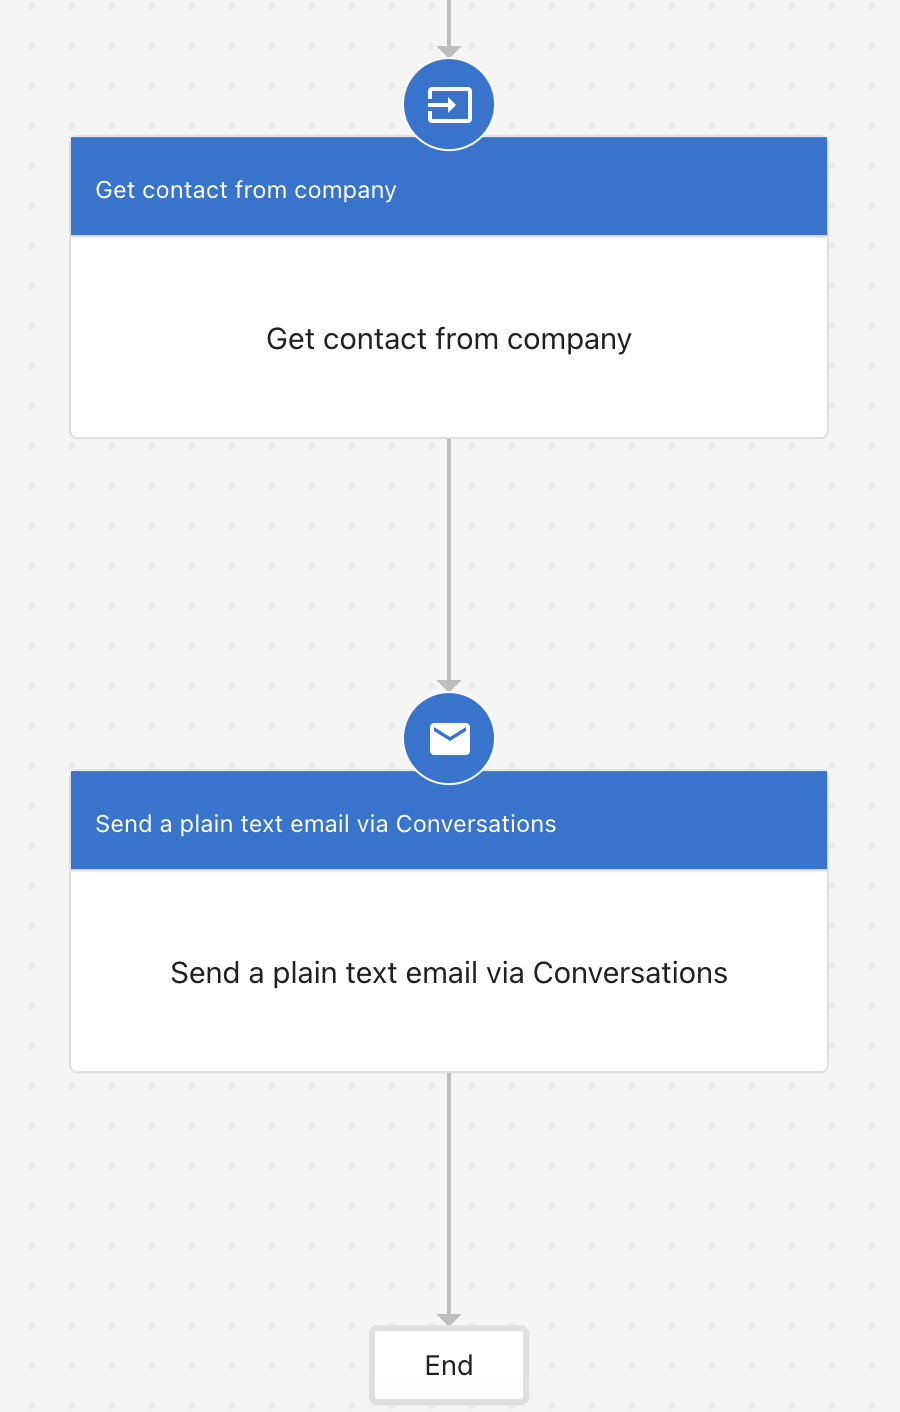
Step 5: Add the steps you want the automation to run. Because the payload only provides a company name, you can't send an email directly. You first need to identify who to email. Add a Get contact from company step to retrieve a contact at that company, then add a Send a plain text email via Conversations step to send them the confirmation.
Step 6: Turn the automation on using the toggle at the top right.
Part 2: Configure the Zap in Zapier
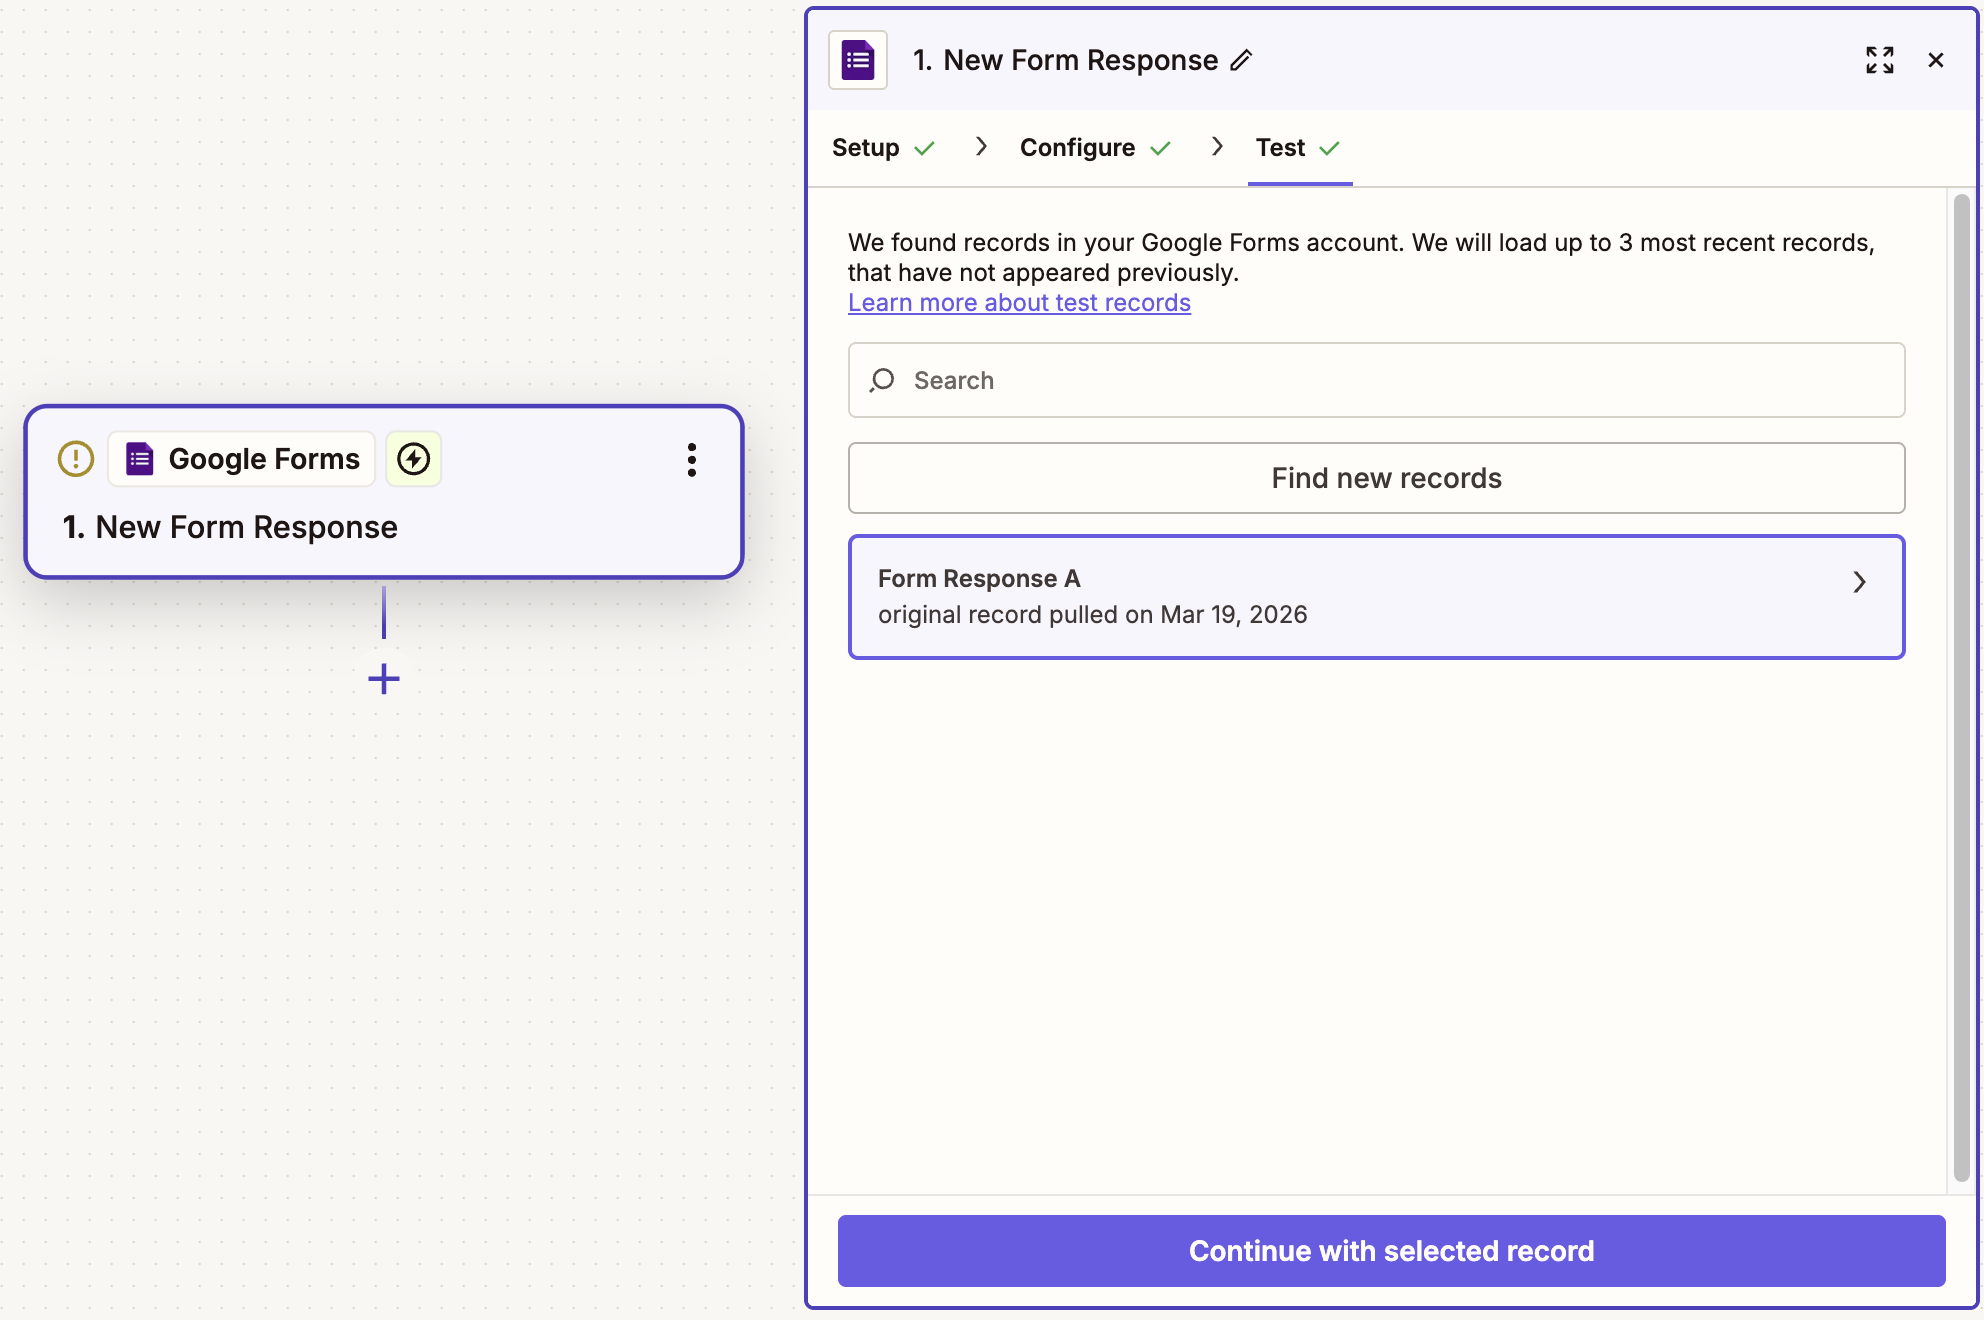
Step 7: In Zapier, create a new Zap and choose the app and event that will start your workflow. For example, select Google Forms as the app and New Form Response as the trigger event.
You can use any trigger available in Zapier: the steps that follow are the same regardless of which trigger app you choose.
Step 8: After setting up the trigger, search for and select Business App as the action app.
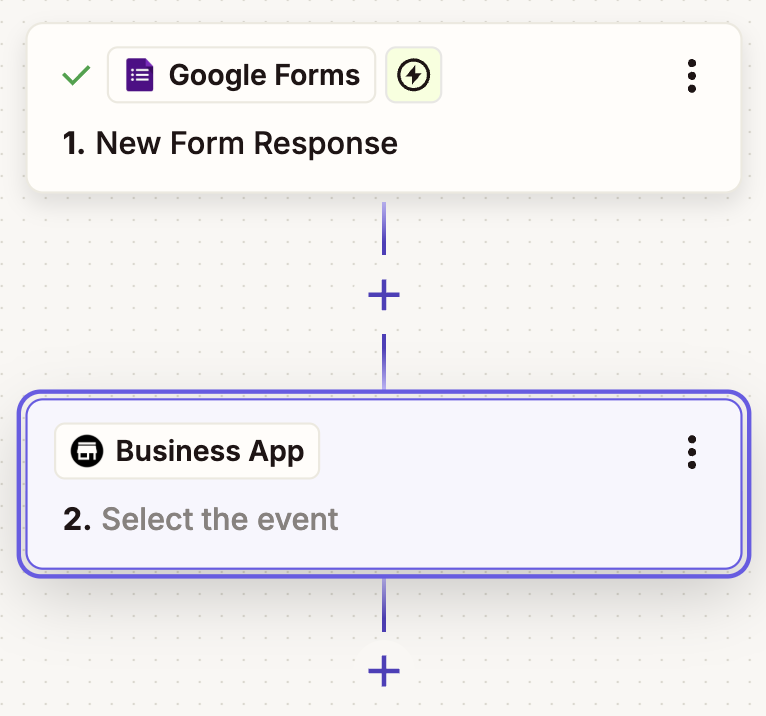
Step 9: Select Run Automation as the action. This tells Zapier to fire one of your Business App automations when the trigger event occurs. Click Continue when ready.

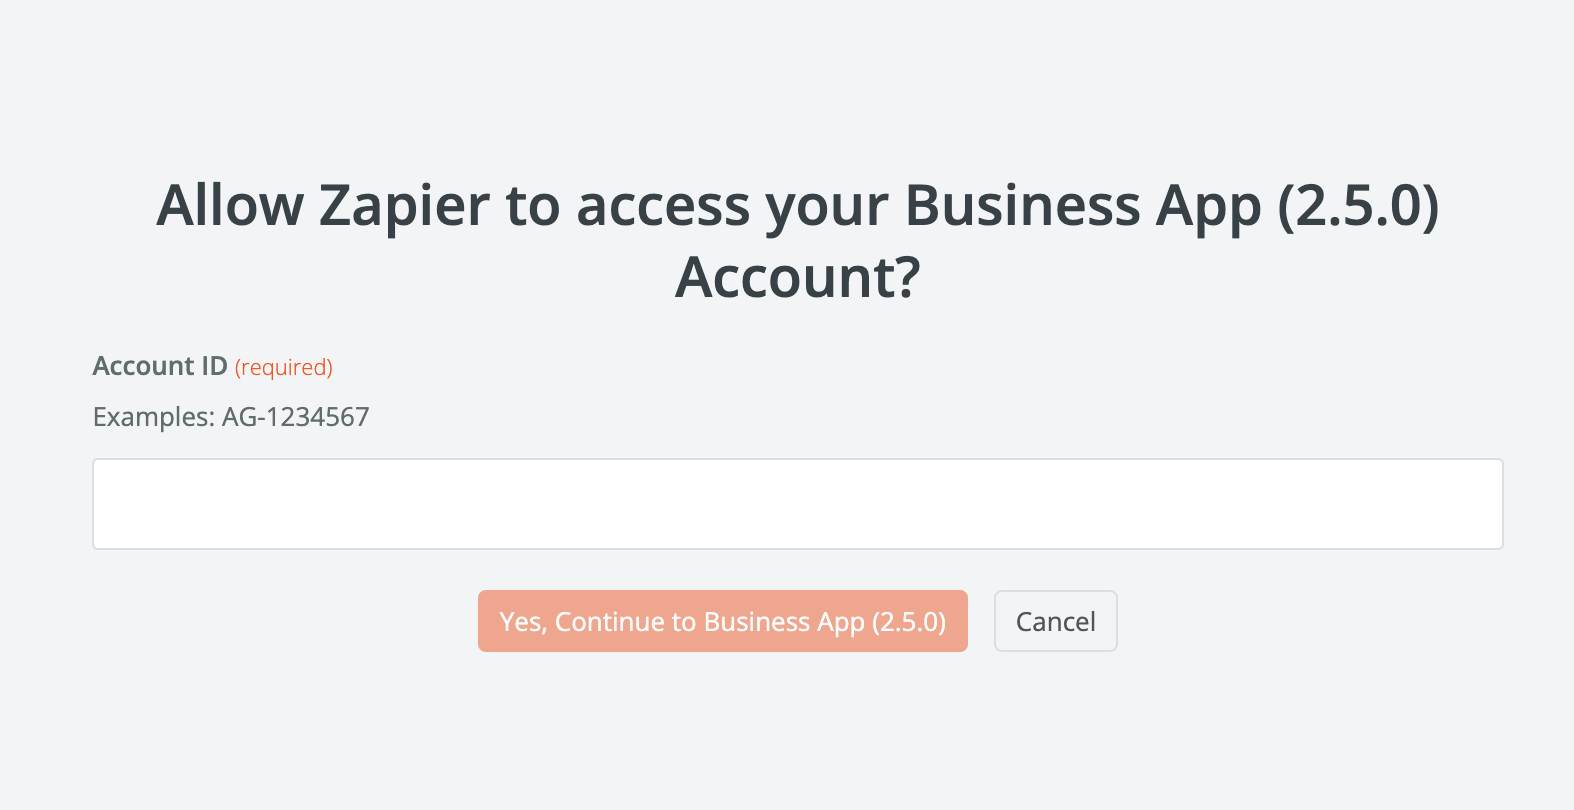
Step 10: In the Account field, click Select to connect your Business App account. You'll be redirected to a login page where you'll enter your Account ID and grant the necessary permissions. After that, you'll be returned to Zapier automatically.
You only need to do this once. Future Zaps using Business App will use the same connected account.
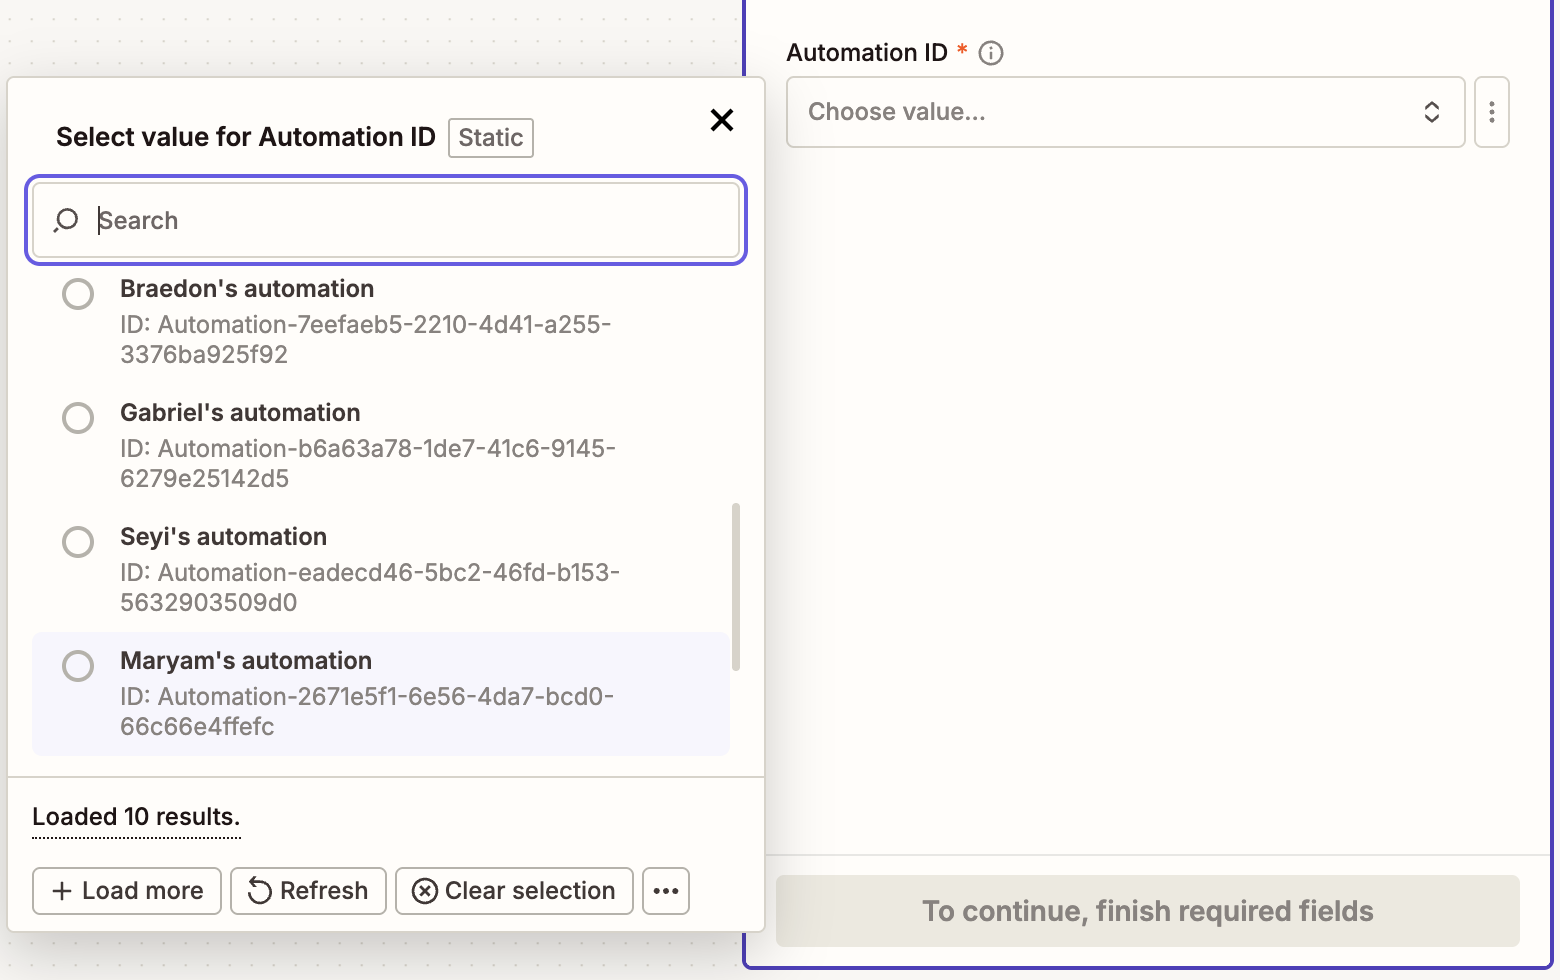
Step 11: In the Automation ID field, search for and select the automation you set up in Part 1. The dropdown lists your available automations by name.
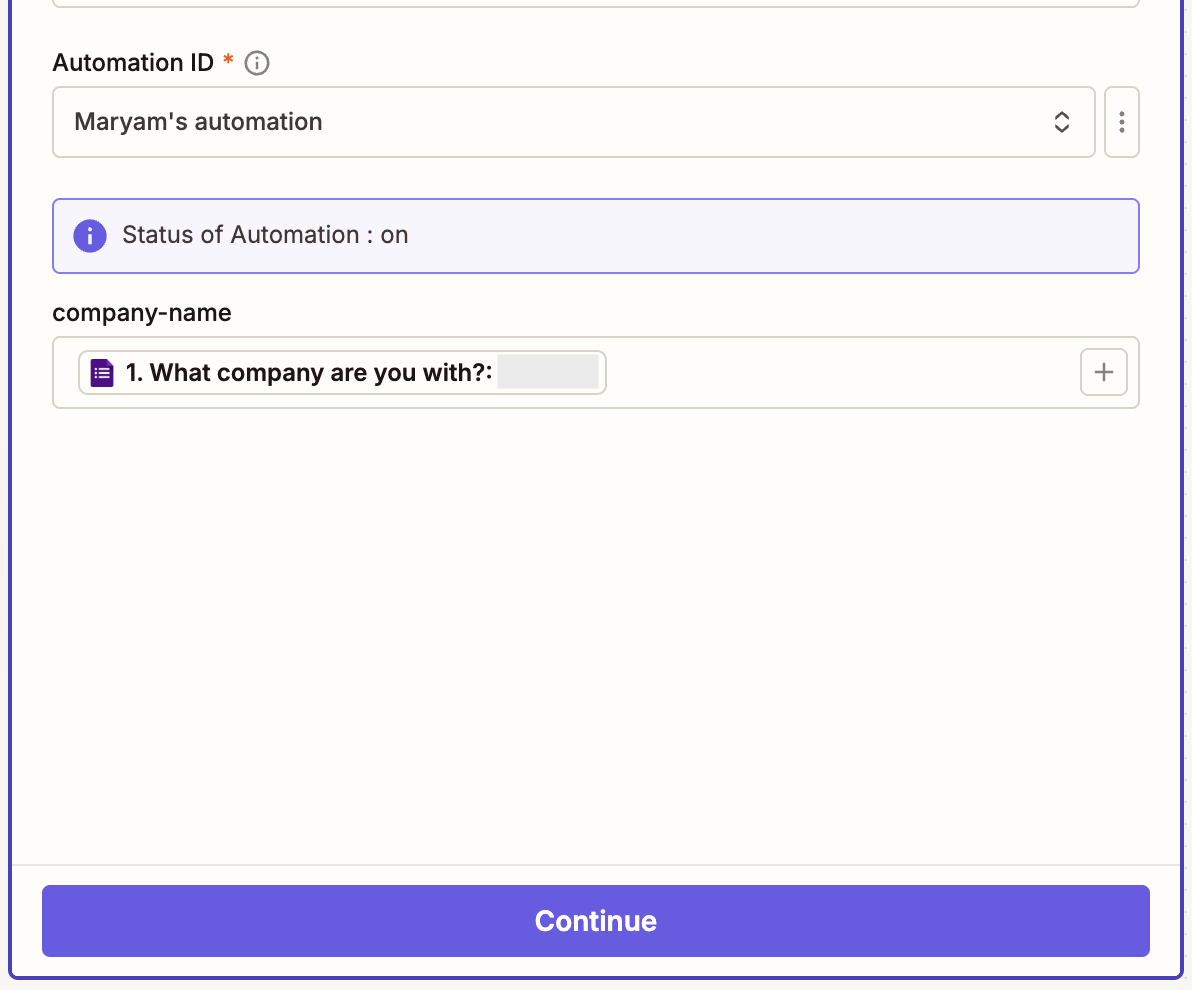
Step 12: Once the automation is selected, the payload data fields you defined in Part 1 appear below. Map each field to the corresponding value from your trigger app. In this example, map company-name to the Google Form question that collects the company name. This tells Zapier exactly which piece of incoming data to pass to Business App.
Part 3: Test and publish
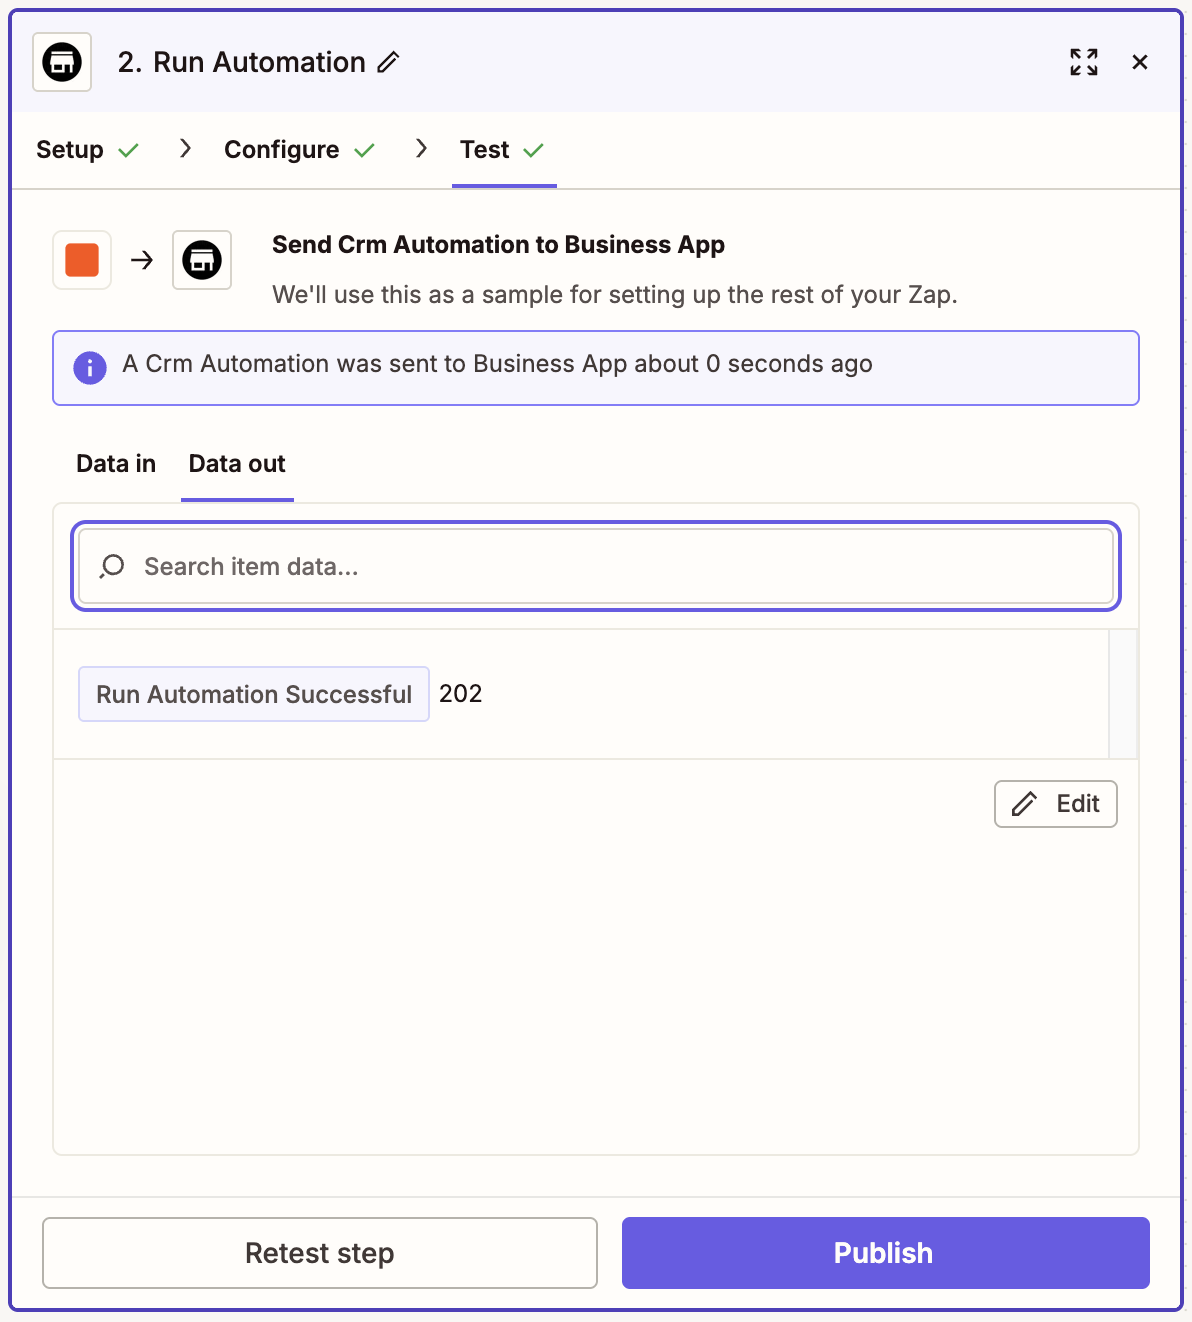
Step 13: Before publishing the Zap, use Zapier's test feature with a sample Google Form response to confirm everything is working. A Run Automation Successful message confirms the automation ran correctly in Business App.
Step 14: Name your Zap and publish it.
Frequently Asked Questions
What trigger does my automation need to use?
Your automation must use the Triggered via Zapier trigger, found under the Advanced section of the trigger picker in Business App. Automations using other triggers cannot be fired from Zapier.
Can I use any trigger app in Zapier?
Yes. The trigger that fires your Business App automation can come from any app available in Zapier: QuickBooks, HubSpot, Google Sheets, Calendly, and thousands more. The Business App action steps are the same regardless of the trigger app.
What happens if the automation is turned off?
If the automation is off, incoming Zapier triggers will be ignored. The automation must be active for it to run.
Do I need to sign in to Business App every time I create a new Zap?
No. Once you connect your Business App account in Zapier, it stays connected. You can reuse the same connection across all your Zaps.
How do I find my Automation ID?
Use the searchable dropdown in Zapier's Automation ID field: you can type the name of your automation and select it from the results. You don't need to look up the ID manually.